
- Video & DVD Tools

In the following guide, we would guide you to downgrade iTunes 12.6.2 to the old version iTunes 12.6.0 or iTunes 12.5.
Part 1: Please uninstall iTunes 12.6.2 from your Mac
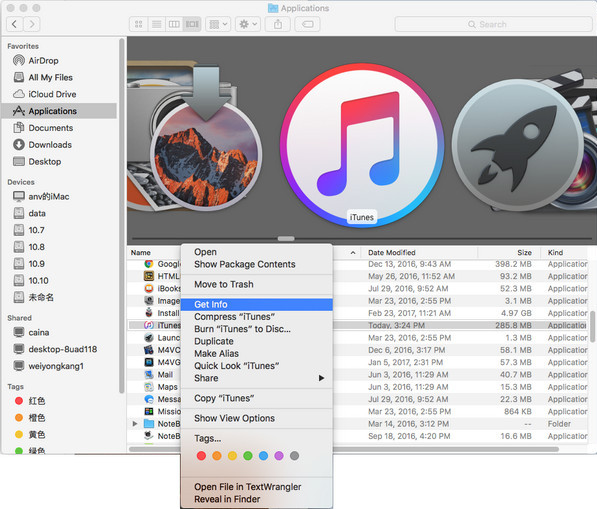
Step 1: Please open the Applications folder and find the iTunes app file (/Applications/iTunes.app). Right-click (or Control-click) on iTunes and select Get Info.
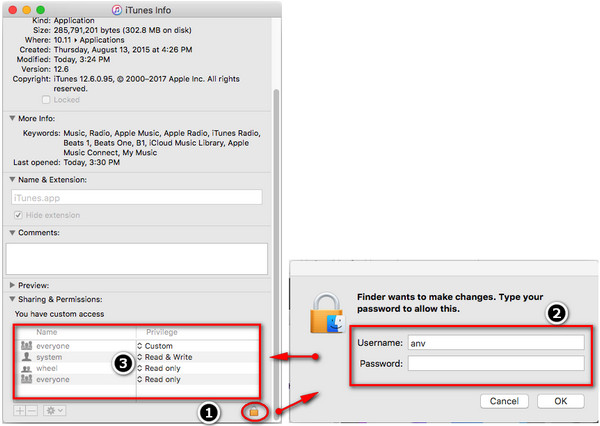
Step 2: Locate and click on the padlock icon on the bottom right side of the window and enter your admin password. This is necessary in order to make changes to the app’s permission settings.
Step 3: Please expand the Sharing & Permissions section of the window if it’s not already visible and change the privileges for “everyone” to Read & Write.
Step 4: Close the Get Info window and try again to drag the iTunes application file to the Trash.
Part 2: Download iTunes 12.6.0 to your Mac
Please download the older version of iTunes through https://www.theiphonewiki.com/wiki/ITunes. Please note that the older version of iTunes may not recognize your iTunes library in iTunes 12.6.0. You need reload the iTunes library.
Part 3: Reload Your iTunes library
Step 1: Please go to your own iTunes Library (your home directory –> Music –> iTunes).
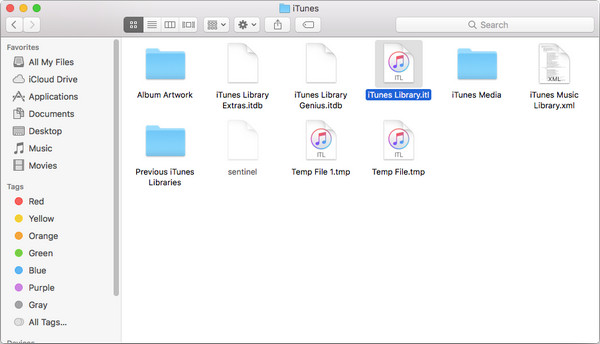
Step 2: Click once on the “iTunes Library.itl” file and then click your cursor into the filename under the icon. Add “.old” as a suffix.
Step 3: Open a folder called “Previous iTunes Libraries” in that same directory.
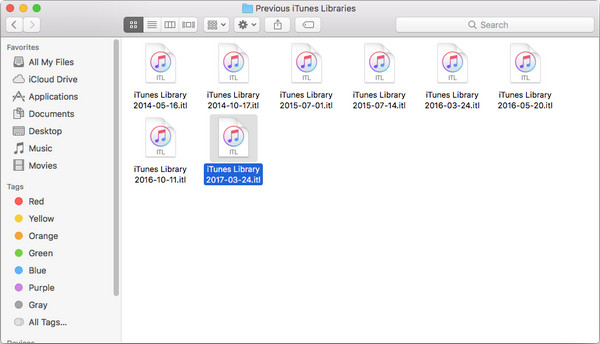
Step 4:The most recent copy of your iTunes Library is the one with the “.itl” suffix. That’s what we want. Duplicate it (select it and choose File –> Duplicate), then drag the duplicate up to the “iTunes” folder one level above.
You can also drag the original and leave the copy behind, of course.

Step 5: Click on the filename, then click *into* the filename just once, so you can change its name. Remove the date stamp so that it just reads “iTunes Library.itl”, then relaunch iTunes.

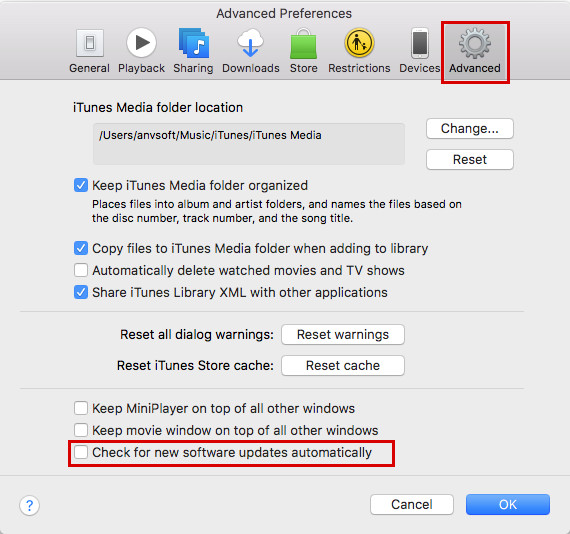
Part 4: Stop iTunes Automatic Updates
1) Launch iTunes, go to menu bar and choose "iTunes -> Preferences -> Advanced". Disable the "Check for new software updates automatically" option and then click "OK" to save the setting.
2) On your Mac, go to System Preferences → App Store. To prevent your Mac from downloading iTunes updates without asking you first, you should uncheck “Download newly available updates in the background" and “Install App Updates”.
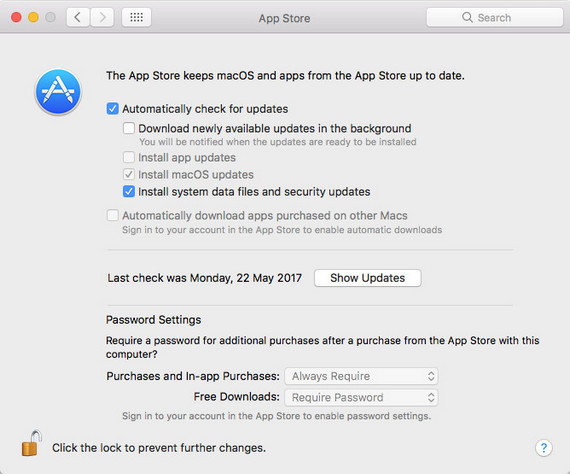
From now on, the Mac will notify you when installed apps updates are available but won’t download them automatically in the background unless you tell it to.